Anatomy of a WurliTzer Theatre Pipe Organ
 RELAY
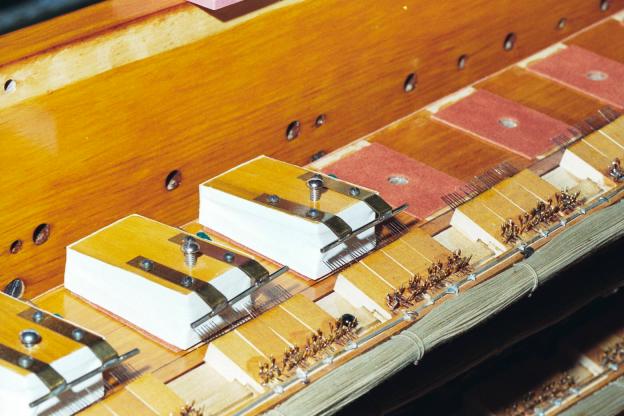
Installing the relay pneumatics.
The gaskets were glued in place first. This makes it much easier to
line up the hole in the gasket with the hole in the chest tray.
With the gasket in place it is easy to see where the pneumatic
should be.
The first relay I glued all the pneumatics in place before the
trays were placed in the chest and had the contact rails attached.
Although the pneumatics were carefully positioned many of the
chopper bars did not align correctly with the contacts. It was then
a process of unsoldering the bars, repositioning them and resoldering.
In the chest that was not easy.
The second relay I mounted the contacts rails first and glued the
pneumatics accordingly, using the gaskets as a guide to ensure the
holes were still aligned. This can still be awkward at the end
where the cables limit the movement of the trays and you are working
against the top of the chest but it was still easier than adjusting
all the chopper bars.
It is also wise to adjust the horizontal angle of the bars to ensure
simultaneous contact of all contact wires and set the downward limit
screws while they are easy to get at.
HOME
RELAY
Installing the relay pneumatics.
The gaskets were glued in place first. This makes it much easier to
line up the hole in the gasket with the hole in the chest tray.
With the gasket in place it is easy to see where the pneumatic
should be.
The first relay I glued all the pneumatics in place before the
trays were placed in the chest and had the contact rails attached.
Although the pneumatics were carefully positioned many of the
chopper bars did not align correctly with the contacts. It was then
a process of unsoldering the bars, repositioning them and resoldering.
In the chest that was not easy.
The second relay I mounted the contacts rails first and glued the
pneumatics accordingly, using the gaskets as a guide to ensure the
holes were still aligned. This can still be awkward at the end
where the cables limit the movement of the trays and you are working
against the top of the chest but it was still easier than adjusting
all the chopper bars.
It is also wise to adjust the horizontal angle of the bars to ensure
simultaneous contact of all contact wires and set the downward limit
screws while they are easy to get at.
HOME